Tuesday, November 27, 2012

Dominant Eye Shooting

The dominant eye  has a lot to do with how people shoot. 

A key factor as to how a rifle is handled is the way you see things-- one of your eyes is dominant. Hold up a finger and look at it with both eyes now close your left eye if your finger stays in the same place you are right eye dominant now switch and close the other eye and your finger will move. For the man with his first gun it will determine how he handles his gun. My Mom was born in a time where being left handed was frowned on so her teacher would crack her knuckles with a ruler every time she picked up a pencil with her left hand. Left handed people are generally left eye dominant. Left alone they will handle a gun with their left hand to pull the trigger with. For them a gun is backwards. Given that the majority of the people are right handed military rifles and most sporting rifles are generally speaking made to function for right handed people. The counsel for shooting is to keep both eyes open when shooting but here again right handed people are usually right eye dominant which creates no real problem. Keeping both eyes open creates a field of vision that allows you to chose varying targets. For the left eye dominant person he must learn to function the gun as a right handed person would, load it as a right handed person wood but shoot it aiming with his recessive eye. In the case of a military rifle for the most part you are stuck with a right handed gun. There is some information on plastic shell deflectors as well as some instructors teaching shooters to shoot the dominant eye. There is also information on instructors teaching people to shoot right handed and insisting on it using their recessive eye. If you try to reverse the way you handle the gun you will be at a tremendous disadvantage as you will not be able to quickly function the gun especially old bolt action rifles so you must from the start learn to handle the gun as it was made to be handled. In the case of being left eye dominant you must verify the target and close your dominant eye aim and fire with your recessive eye and open both eyes and pick another target and close the dominant eye aim and fire. Well you might say I will just buy a left handed gun well in a stress situation you will have to learn to shoot all over again if you louse your gun. Some military rifles are known for throwing hot brass in you face. More than likely if you get your hands on another rifle if you louse yours it will be right handed too. For you learning as a lefty with your first gun it would pay to learn how to shoot right handed. It will be a little more work but worth the investment of time. Then it will never mater if you have to pick up a right handed gun it will always be usable. If you ever ended up in a street fight in the army you could swing the gun from shoulder to shoulder depending on the position of the  wall you were shooting around giving you a tremendous advantage.

SKS after market bolt 

 If you have always invested in left handed guns then you might want a left handed semi-auto rifle. But you might argue that an inexpensive one might not be available. Then you need to look at the inexpensive SKS Chinese import guns. For years there have been gunsmiths who cut off bolt handles and replace them. The SKS works on a open top bolt the handle can be cut off and rewedded on the other side. The rear dust cover would need to be reshaped to match the right side and you would have a very fine left handed gun. They also sell a new safety release that can be used for the left hand. By saving the right handed bolt and using a aftermarket part then you can make the gun right handed again if you should ever decide to sell it and get top dollar. You can also take in an aftermarket bolt and not the whole gun for the repair this should keep you off of any lists. This weld would need to be preformed by an experienced gunsmith   Richard W Norman

If they pass laws against guns then you will either make your supplies at home, salvage or do without. Below 1) All American Anti-disarmament Handbook, it is a ammo, gun, supply system in a book  you can make just about anything you might need in an emergency, gun manufacture, repair and ammo production with out loading equipment, three different powders and primers and much more. 2) Bullet Casting a War Time Resistance Factory, turning hobby equipment into a continues bullet supply system 3) Boobytraps nasty homemade tools designed by the military. Taking junk and making improvised boobytraps, over 70 titles to chose from  www.firstpatriotpress.com

All American Anti-Disarmament HandbookBullet Casting: A War Time Resistance GuideBooby Traps

Monday, November 26, 2012

Going the Right Way

Political leaders must be like a horse with a good bit and tight reins. The horse chosen as the method of transportation is usually not important in going to a destination. The most important thing to remember in achieving any goal is that the horse you chose is headed in the right direction.
 In Arabia, the Arabian horse is most prized among the Bedouin. The story is told of the training of these horses. After a colt is born it is well treated like the family pet. A bell is rung and the horse is led to the master’s tent at the same time each day. Soon the horse will come whenever the bell is rung. This proceeds  continues in tell the horse is full grown. The horse is then stabled in the hot sun for 3 or 4 days with no food or water. On the last day the gate is opened and the horses head for the food and water just before they get to the food and water the bell is rung. The horses that neglect the bell are separated and sold as pack animals. You see if the rider falls off in the desert he is wearing a bell around his neck and he rings the bell and the horse will return to him. We are at the point that our politicians need to hear the people or be rejected by the people. Political recalls may be the wave of the future! Richard W Norman

If there was ever a war then you will either make your supplies at home, salvage or do without. Below-- Bomb Shelter and Fall out Shelter All the designs were tested by the government and proved useful 1), 2) and 3) below each are the actual plans for home construction designed during the cold war. Eleven plans to chose from as well as Civil Defense manuals instructing you on how to survive nuclear war. Eleven  shelter plans to chose from  You can have them as e-books now as well as military and gun books over 70 titles to chose from. www.firstpatriotpress.com
Basement Concrete Block ShelterBelowground Clay Masonry Fallout Shelter PlansFamily Fallout Shelter

Friday, November 23, 2012

Changing the World

We have no right to ask why the world is not different if we ourselves will not make a difference.Richard W Norman

If they pass laws against guns then you will either make your supplies at home, salvage or do without. Most gun malfunctions happen because people do not know how to take them apart and clean them. Below 1) SKS instruction manual 2) M1 Garand Instruction manual 3) M14 and M14A instruction manual with Bipod instructions. To see military e-manuals and gun e-books click here www.firstpatriotpress.com. No waiting, get it now as an E-Book over 70 to chose from!
SKS Simonov Rifle Type 56M1 Garand caliber 30M14 Rifle- M14A1 Rifle- Bipod M2 Rifle

Thursday, November 22, 2012

Lead home made casting pot Magmaw 20 of 20

No I am not selling you the blueprints to make this pot you will see everything you will need to  know on how to make this 90 lb lead melting pot  on this site for free. 

A few days after the post below was prepared  I found in my junk the missing 1/4 20 nut for the tower and the four 10/32 jam nuts for the two smaller bolts. The metal work is now 100% complete. Just for fun scroll down  to post 1 of 20 and refresh your memory on the pile of junk I made most of this out of. 
Finishing touches on the metal work-- Final assembly of metal parts

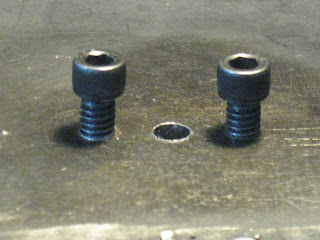
A small grinding stone in a an electric hand drill was used to remove the drill through burs and welding splatter by the drain hole above. The 1/4 20 1 inch bolt in the tower needs a jam nut I know I have one somewhere and will eventual find one and install it. the 10 / 32 screws also need a jam nut and to be cut off. 
All I need now is the electrical parts and to burn off the zinc coating on the drain rod as it will turn into a poison gas under high heat. I had to buy an additional $6 in screws so the grand total was $49.98. I paid to much for the 1/4 inch by 5&1/2 inch tall - 8 inch wide pipe for the pot but at the cost of gas I felt it was the best alternative. Scrap metal price for the pipe would have been around $2 so this pot to this point should have been  $32. I will lay this project aside for now in tell I can find the lowest price for the heating rods and thermostat.  
To see the construction from the beginning each post has a forward at the bottom so you can click it and carry you to the next post for this project To see the construction starting at the first post on making this pot click here
P.S, Other helpful hints and gun products you can make at home can be seen on the side bar thanks for visiting the site.
Bullet alloy-- there are two diffident methods for getting alloy mentioned on this blog one is from wheel weights and the other is from a sail boat keels  . This link will show a keel being cut up with a chain saw and melted in a Magma melting pot. 
  Yours truly  Richard W Norman the Junk-Ologist.

If they pass laws against guns then you will either make your supplies at home, salvage or do without. American Handbook on Guns Ammo and Freedom 


Wednesday, November 21, 2012

Modern Slavery

To become a slave is not hard all we have to do is nothing and let someone else decide our future. Richard W Norman

If they pass laws against guns then you will either make your supplies at home, salvage or do without. American Handbook on Guns Ammo and Freedom 

Tuesday, November 20, 2012

The Foundation of Freedom

The foundation stone of freedom is set firmly on the rock of virtue, temperance, honor, honesty and brotherly kindness. When a nation moves away from these principles no nation or people can long remain free. Richard W Norman    


If they pass laws against guns then you will either make your supplies at home, salvage or do without. Below 1) Tactics Techniques and Concepts of Anti-armor Warfare historical training manual 2) KFM Fallout Radiation Meter Kit Instructions This is a home made fallout meter developed during the cold war. They knew the public could not get a meter in an emergence so this was designed so anyone could build one with stuff you had around the house.3) US Ammunition Price list from 1912. Not just a neat document but it includes bullet weights and black powder charges for many old cartridges.  To see military e-manuals and gun e-books click here www.firstpatriotpress.com. No waiting, get it now as an E-Book over 70 to chose from!

Anti-armor Infantry Tactics Techniques and ConceptsHomemade KFM Fallout Radiation Meter KitUS Ammunition Price List for 1912  

Monday, November 19, 2012

Lead home made casting pot Magmaw 19 of 20

Making the drain-- This piece of steal was a road side pickup and was used on machinery so it is a very quality piece of metal. It is very tuff, yet not hardened.The chop saw blade paid a price for cutting it yet it was workable to a file using a grinder the spark test showed it to be nickle steal. You can not just look at a piece of metal and know what kind of steel it is. The best way to explain how to know the differences by the spark pattern from touching metal to a grinding wheel. This metal produced a small orange spark stream, telling me that it was nickel steel.  Other spark patterns tell what other metals are. In my book I explain home gun production and emergency gun construction and repair.       
Above the metal can be flattened with a file and the right side was high and so a circle was drawn and a file was used to remove some of the metal. I would work the metal in tell most of the mark was removed. Both sided were flattened with a file and finally the part was taken to a belt sander and held against the moving belt to finish the job on both sides. The large hole is for a center for a lathe for turning and I put it in there some years ago making a part for something else. Below I am countersinking for the 1/4 20 bolts and will do the same on both sides of the part. The large hole  in the middle douse not go all the way through. A smaller hole with a #44 drill bit is preferred. The large hole will first be tried against the 1/4 inch drain. If it douse not prove functional the part will be flipped over and tried. If it douse not work I will make a new one. with a single #44 drill bit. 
Note the 1 inch long 1/4 20  bolt in the tower below this will allow for the adjusting of the push rod drain rod so it will not pull to far out of the drain hole

Not the drain tip on the drain rod was done by hand against my bench grinder. In a shop this would have been a turning operation in a lathe. I have a lathe but did not use it.   
Note the small hole finishing the job on the bullet casting drain plate above. If you are making ingots remove this drain plate. Richard W Norman                                  To view next posts click

A Blog has the ability to up date material and even though time has passed and this is an old post I noticed that a lot of people will only view one page and move on. So it seemed practical to place a photo of the finished product on each post.   


  If they pass laws against guns then you will either make your supplies at home, salvage or do without. Below 1) AK47 operators manual all the army thought a soldier needed to know 2) Arasaka Rifle some of the history as well as information on some models you should not shoot 3) Gun Reloading Equipment a Buyers Guide the very least you would need to buy. To see military e-manuals and gun e-books click here www.firstpatriotpress.com. No waiting over 70 to chose from, get it now as an E-Book!
AK-47 Operator Manual for Assult RifleArisaka Rifle 7.7 & 6.5 JapaneseGun Reloading Equipment: A Buyer

Sunday, November 18, 2012

Vigilance is Better Than Personal Sacrifice


No man ever became free without his own personal exertion, No man ever remained free without his own personal vigilance, and men louse their freedom by their own personal neglect. The generation lousing their freedom must use every exertion to reclaim their freedom but the price will be high when the ability to restore liberty by law is no longer possible. Then, the only offering left upon the alter of liberty is our own personal sweat, flesh, bone, blood and sinew. Richard W Norman

If they pass laws against guns then you will either make your supplies at home, salvage or do without. Below 1) All American Anti-disarmament Handbook, it is a ammo, gun, supply system in a book  you can make just about anything you might need in an emergency, gun manufacture, repair and ammo production with out loading equipment, three different powders and primers and much more. 2) below is self explanatory and is a operation manual as well as maintenance manual for the gun.3) Salvaging old used brass and how to bring it into a usable condition. To see military e-manuals and gun e-books click here www.firstpatriotpress.com over 70 to chose from. No waiting, get it now as an E-Book! 
All American Anti-Disarmament HandbookBrowning Automatic Rifle BAR 30 CalCleaning and Polishing Brass:Handbook

Friday, November 16, 2012

Lead home made casting pot Magmaw 18 of 20


You have seen this photo above before but note the arm sticking out at the bottom of the base plate this will allow for the placing of one of the 1/4 20 screws in a most substantial positions remember that I purposely made the metal plate under the valve assembly in this position 1/4 inch thick. The rest of the scrap metal around the top of the melting pot was 1/8 thick This extra meet so to speak under the valve will allow for a better hold when the screws are taped.   
Looking for the best position for the screws so as to give most of the pull of the handle a direct hold as nearly as possible in line with the downward force when the handle is pushed  
After drilling the holes in the base plate a little white spray paint was used so the drill points could be marked. Note the half moon at the back  in the photo below which will support the valve spring. It was welded on each side of the back of the base plate.
The holes were marked. A tap set can be bought for as little as $14 to $20  and an intermediate set around $50 and the prices go up from there I have a $15 set which has served me well for years.
Marked spots for drilling
Below a tap is being used in a drill press. (NO! YOU DO NOT TURN ON THE DRILL PRESS!)  A light or genteel downward pressure is all that is required. As long as the part is not moved when you drilled the hole the tap will start perfectly straight. There should be a dimple in the back of the tap. The smaller cheep taps may not have the dimple but given the cost of $15 vs $50 or more I would buy the cheep ones any way. Tapping can be preformed with out a drill press but there is more of a danger in braking a small tap. Process-- the tap is oiled and started straight in the hole. Once the tap is in position and started a few turns it is turned 1/8 turn and backed off and go further an additional 1/8 turn and back off then another 1/8 turn and repeated. Keep well oiled! There are drill bit cards that are generally free from machinist supply stores they will tell you which tap to use to which drill bit. A bit that is to big will not produce threads and a bit to small will brake a tap.     
Below is the drain hole and two tapped holes. These holes were not drilled all the way through but only part way through and taped. These two holes will hold the drain plate and allow me to use this pot as a casting pot or I can remove the drain plate and use the 1/4 hole wide open as a smelter to clean lead and make large ingots. When you drill a blind hole or a dead end hole the point of the tap will bottom out-- be mindful for when the tap stops as you do not want to brake one. Some taps are designed for this kind of hole and do not have a point at the end  but is square which allows the tap to go further. I did not have one or use one but was careful to not drill all the way through leaving 1/4 inch-- 3/4 inch long 1/4 20 screws. 

Click for next post on this project.

A Blog has the ability to up date material and even though time has passed and this is an old post I noticed that a lot of people will only view one page and move on. So it seemed practical to place a photo of the finished product on each post.   

If national disarmament came than having readily concealable information in making arms, ammo, and substitute military products would be critical. Salvaging readily available surplus military products and knowing how to use these items essential in keeping the nation free. You can now have a library of such books that will fit on a CD or flash drive for a small investment. Why not? To see military e-manuals and gun e-books click here. No waiting, get it now as an E-Book!

Cleaning and Polishing Brass:HandbookBlack Powder Arms in Modern ApplicationImprovised Munition Handbook Homemade munitions


Thursday, November 15, 2012

Henry Ford and Yoda Both Had the Force With Them


To clean up Washington perhaps a quote from Henry Ford would be appropriate “Whether you think you can or that you can’t you are right.” We dare not believe those that say we can not clean up Washington. “Do, or do not, there is no try,” Yoda from Star Wars
  Richard W Norman  

If they pass laws against guns then you will either make your supplies at home, salvage or do without. You can now have a library of such books that will fit on a CD or flash drive for a small investment. Why not? Below 1) How to peaceful exit a potentially deadly situation as well as gun use. 2)Homemad sheet metal brake. This tool was manly designed as a homemade clip factory but was placed in the book below as a hobby tool for bending metal. 3) below is self explanatory and is a operation manual as well as maintenance manual for the gun To see military e-manuals and gun e-books click below. No waiting, get it now as an E-Book! You can now have a library of such books that will fit on a CD or flash drive for a small investment. Why not? If they pass laws against guns then you will either make your supplies at home or do without.
To see military e-manuals and gun e-books click here www.firstpatriotpress.com. No waiting over 70 to chose from, get it now as an E-Book!

   Combat Handgun Tactics Building the Sheet Metal BrakeM16 Rifle Manual of Operation for 5.56mm

Thursday, November 8, 2012

Lead home made casting pot Magmaw 17 of 20


It would be best to start at the first post on this project. The internet is a wonderful thing but for some reason some people are taken to the 17th post for this project. To start from the beginning click here and at the end of each post on the project you can click to go to the next post in order. You can also use the side bar and scroll down to the first post. This will not be a wast of time as there is so much useful information on this site in using your gun, reloading, bullet casting and a lot of other information. I am not selling the instructions for this project you will see what you need to do to build this project on the 20 posts

10/32 inch on one end and 3/8 on the other this allowed me to construct this coupling into the hinge joint

  This chapter will describe how to make all the parts you will see safely by the end of this post- so there is no reason to use the method I am about to describe. After all a little extras time is a small price to pay for a safe construction job.

 MAKING CHOP SAW PARTS-- Emergency application only not a safe solution for parts construction. Do not try this at home.The purpose of this part of the blog is to show what could be done in an emergency and nothing more. Every part you will see below could have been made with hacksaws and files and a drill press but more time consuming. If our national sovereignty was ever threatened from within or from without then understanding how to misuse tools to make a fast product could be critical to national survival. Mentioned earlier a chop saw can seriously, maim, blind or kill. The blade is brittle and easily broken-- traveling at near bullet speed so a large chunk could do some serious damage. 
I have had some extended use of the chop saw and felt comfortable enough to do what you are about to see. (But I was not really that comfortable!)
Lever connecting hole. The coupling was 3/8 inch on one end and the other end was 10/32 this allowed me to make the part without having to tap the threads for the hole where the 3/8 rod screwed in 
1 foot 3/8 inch bolt  allowed me to use the chop saw to make the grove for the handle. The end of the bolt will obviously be shortened. The point of the valve is like a cheap yellow pencil with a stubby angle  this was sharpened on a bench grinder and cut off in tell I got good at it then the bolt was cut to the right length and sharpened appropriately. The drain hole is nothing more than a 1/4 inch hole drilled in the bottom of the pot   

File work finished the job
Metal base
Scrap from another project 
Grove cut by a chop saw close to the size of the future handle. When the cut was made the part was pressed sideways to the blade slowly expanding the width of the grove. The grove was finished with a file.
Note the size of the chop saw blade, there is very little left . I am thinning the part so as to eliminate some file work.
Note the rough condition of the part but a lot of metal was removed 
Filing did not take long
Vice grips held both ends and the chop saw cut it in half but the metal was spreed open when it got near to the end of the cut to keep it from pinching the blade. Note what is left of the front fender  to the right  that I made the front cover of the casting pot out of. The fender was barley tall enough to make the front cover. To conserve metal I used the chop saw to make the cut to remove most of the needed part. Here to grate care was needed so the fender did not pinch the chop saw blade.
Another large scrap used to make the fulcrum in the photo above. Note the change in the color of the steel from the heat from the chop saw. In my book I disuse the colors and changes necessary to harden metal to make emergency gun parts (or the whole gun). Though this piece of metal did not go through the whole process necessary to harden the part it is an excellent example of what you would be looking for during some of the color changes. Purple in the upper left hand corner makes things chisel hard and straw yellow to the bottom right removes the brittle nature of the metal after hardening.
Filing a finish on the fulcrum
Smoothed on all sides
A hand grinder rounder the corners, Note the small size of the worn out chop saw blade . It would be to dangerous to use a full sized blade
Note the overkill on the parts size for the fulcrum and the tower, this will allow for the use of a stick welder with no chance of destroying the parts. This auto valve spring was in my junk bucket and is really old, I do not remember what type of car it came from . The pot valve rod was put in the center of the hole and the parts were marked for welding. The holes in the valve rod hinge bracket and fulcrum were drilled with a #19 drill bit. A 10/32 screw fits perfectly in the holes and two 10/32 nuts on each screw will be used as jam nuts.    
A half moon will be welded to the base to keep the spring in position. 

Every part you have seen in this valve system could have been safely made with hacksaws and files. (It would not have taken that long with files and hack saws so there is no reason to use the method I have just used. To produce the tower drill a hole near the top of the grove and use a hack saw to cut out the long sliver.Fixing the fulcrum would be about the same. the base could obviously been done by 100% hacksaw and file work.)  What you have seen with a chop saw is a quick production process only usable for a time of emergency. In my book I describe how to make a Sub Machine Gun (SMG) bolt by hand with files, a hack saw, and an electric drill. It was copied from a de-milled WWII SMG. In an emergency you do not have to settle for a single shot weapon. This gun would take from a few days to week to produce at home. Other guns are listed as well that could be made in a few hours. I made it a point not to completely finish any parts on the SMG so as not to be in violation of any obscure laws that I might not known about. 
A Blog has the ability to up date material and even though time has passed and this is an old post I noticed that a lot of people will only view one page and move on. So it seemed practical to place a photo of the finished product on each post.   

If they pass laws against guns then you will either make your supplies at home, salvage or do without. You can now have a library of such books that will fit on a CD or flash drive for a small investment. Why not? Below 1) Home mad sheet metal brake. This tool was manly designed as a homemade clip factory but was placed in the book below as a hobby tool for bending metal. 2) below is self explanatory and is a operation manual as well as maintenance manual for the gun. 3) Black Powder Arms in Modern Application in a time of desperation you may need to use a black powder gun because you cannot get anything better better covers everything including powder production and salvaging potassium nitrate from dirt, loading, etc . To see military e-manuals and gun e-books click here www.firstpatriotpress.com over 70 to chose from. No waiting, get it now as an E-Book!
Building the Sheet Metal BrakeBrowning Automatic Rifle BAR 30 CalBlack Powder Arms in Modern Application